Advertisement
How To Build The Perfect Cheese Board: 5 Steps + Expert Ideas To Make It Yours

Creating the perfect cheese board is nothing short of an art form. If done well, you'll have a curated platter that (almost) looks too good to eat. But chuck all the produce haphazardly onto the board, and it'll resemble more of, well, a hot mess.
To master the artistry, we enlisted the help of Toria Smith, founder of U.K.-based grazing catering company GRAPE & Fig. Here, we pick her brain on how to build the best cheese board, every single time, plus some gorgeous pairing ideas for you to try out.
First, what you'll need.
In terms of the board itself, Smith is partial to a square, wooden platter. She's a stickler for the sophisticated, sharp edges, but any platter you have will suffice, no matter the shape. Even a standard dinner plate will work; if you're serving two to four people, a dinner plate may be just what you need, especially if you're using rich ingredients. "You'd be surprised how far a dinner plate of dense food goes," Smith notes.
You also don't necessarily need to have "cheese knives"—just a standard knife will do if that's all you've got. Sure, a proper cheese knife may give the board a certain sense of grandeur, but it's not the be-all and end-all; you can still create a fancy-looking platter with any tools you have in your kitchen.
5 steps to cheese board artistry.
Ready to place your produce? Here are the steps to cheese board success:
First, fan out your cheeses.
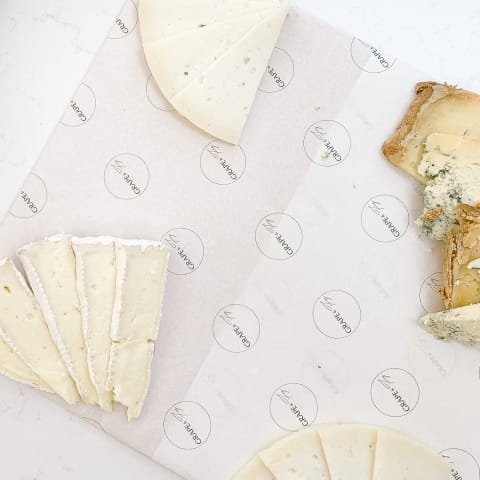
The first tip is to show off the star of the board—the cheeses, of course. Smith suggests having at least three options—a soft, cow's-milk cheese (like Brie), a crumbly blue (like Stilton or cambozola), and a hard cheese (like manchego). But instead of plopping down your cheese wedges and calling it a day, Smith recommends cutting and fanning them out into a triangular shape. "It instantly fills up the board and makes it look more appetizing and creates a little bit more of an intrigue," she says.
You can even swap the cheese for something else that's fan-friendly, like creamy avocado. Just slice a few halves and fan them out on the platter. "Instead of putting half an avocado down, it instantly makes the board look a little bit more intriguing," Smith explains.
Create your edges.
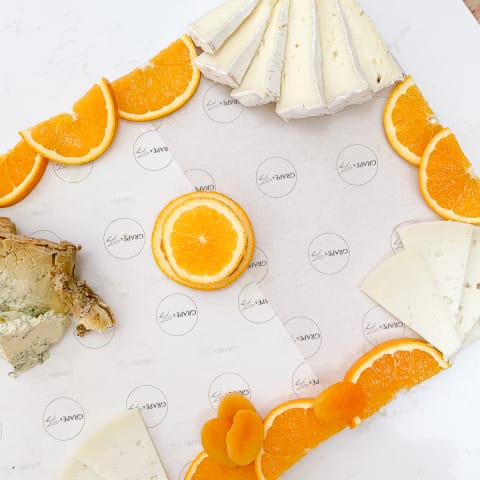
Here's the biggest mistake people make when creating cheese boards: They pile on a bunch of loose or oily ingredients (think blueberries, pistachios, or sun-dried tomatoes) that fall or drip off the edge as soon as you transport your platter. Not to mention when people start digging in: "Things just start falling everywhere, and it gets really messy really quickly," Smith says.
The solution? Create an "edge." Grab produce that's a bit more sturdy, like oranges, grapefruits, cucumbers, even round cured meats. Cut those slices in half to create a sharp edge, and place them around the perimeter of the platter. "You're essentially creating a little barrier between the rest of the platter and the outskirts," says Smith. That way, you don't have to worry about your precious olives rolling off the edge; everything will stay intact, even as you move the board from room to room.
Make mini mountains.
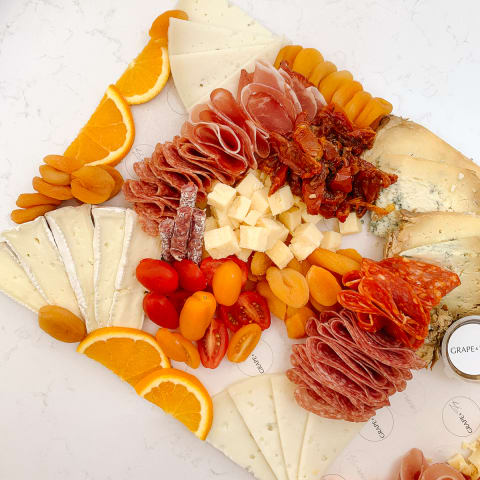
With what you have left (cured meats, fruit, sun-dried tomatoes, and the like), make mini piles on the board. Style them into little florets, sectioning them out across the platter. For vegan and vegetarian folks, you can pile on your falafels, your sweet potato pakoras, your artichoke hearts—whatever you have on hand to transform into mini mountains.
No matter what produce you use, "create whole, dense sections with one type of produce and one type of color," Smith adds. It's the key to keeping your cheese boards stylishly cluttered rather than messy.
Fill in the gaps.
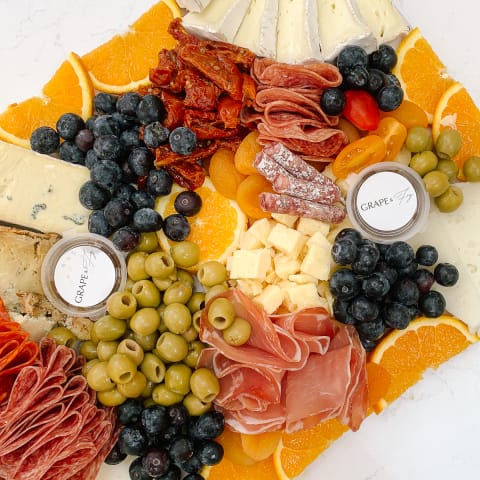
Even with those mini mountains, you'll likely have small gaps in between your piles. That's where your looser objects come into play; think olives, blueberries, blackberries, nuts, pomegranate seeds—choose your own adventure here. Place whatever you have in those gaps to make the board look super dense and stunning; "The idea is not to have any space left on the board that you can see so everything is completely fit, but it doesn't look like a mess," Smith advises. Perhaps the finest line in the art of cheese board making.
Make it pop.
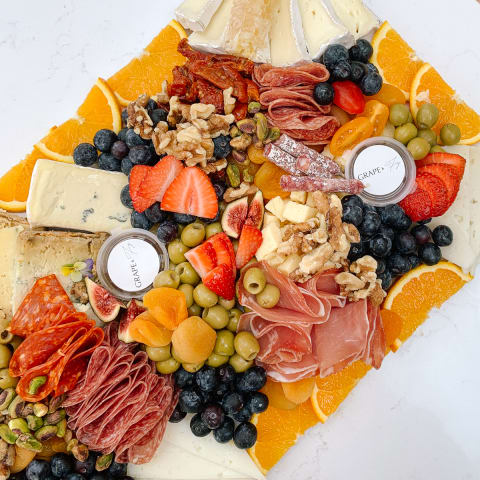
As for the finishing touches, there are a few extra ingredients to sprinkle on if you really want to go the extra mile. While not completely necessary, "it makes the platter go from an 8/10 to an 11/10," says Smith.
Grab your delicate ingredients—figs, honeycomb (or a drizzle of honey, if that's all you have), some cut strawberries, ground pistachios—and place them on top of contrasting colors. If you have edible flowers or herbs, that's stellar—it'll give the platter quite the sensorial experience. "It just elevates your graze, taking it from normal to something that looks really gorgeous," Smith notes.
Pairing ideas.
OK, so you've got the basics down. But to really make your cheese board stand out, why not experiment with some mouthwatering flavor combinations?
Smith's go-to is to pair honeycomb with Brie. "It's an absolute must," she gushes. Of course, if you don't have fresh honeycomb, a drizzle of regular honey will work just as well.
You can definitely opt for themed boards, if that's more your jam. You'll follow the same method, but with a certain list of ingredients. For example, if you wanted to go the Mediterranean route, you could load up on feta and throw in some gorgeous antipasti. If you wanted to follow a certain color scheme—an orange-hued platter, perhaps—opt for citrus, dried apricots, and oranges cheeses like cheddar or red Leicester. Let your creative juices flow however they may; with Smith's method, you'll have an artfully curated board every time, no matter the ingredients.
To serve.
According to Smith, refrigerated cheese should thaw for about an hour in order to reach room temperature (which is the ideal temperature for serving). Creating the board takes around 30 to 45 minutes, depending on how adept you are at assembling. So by the time you finish the platter, the cheese should be at the perfect serving temperature. That said, you'll want to serve your cheese platter straight away to keep it as fresh as possible. "Show it off!" Smith advises (presentation is technically the sixth step in the method, after all). Even if that means snapping a picture to share on your next Zoom call before digging in.
The takeaway.
As with all forms of art, cheese-board-building is inherently subjective. You might love an abstract, Jackson Pollock-esque cheese board—and that's OK! There's no reason to agonize over where to place your manchego. But for those looking for some expert-level ideas, this works-every-time grazing method is fail-safe, and it's a great activity to keep you occupied over the weekend. Even if you aren't gathering for a dinner party, there's certainly no harm in a cheese board for one.