Advertisement
How To Make A Pumpkin Pie Healthy Enough To Eat For Breakfast (Plus, It's Vegan & Gluten-Free!)


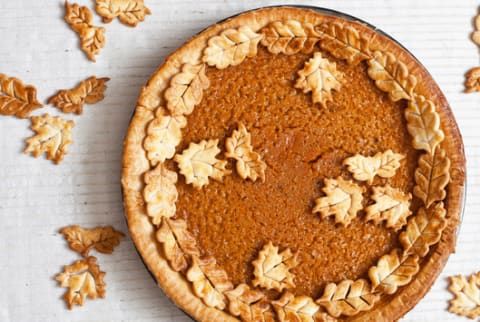
After a long, hot summer, fall is officially here. Leaves are turning shades of fiery orange and red, the air is crisp, and the scent of pumpkin spice lattes fills the air. If you can’t get enough pumpkin, meet your new fall addiction: a pumpkin pie that’s healthy enough to eat for breakfast. The recipe, created by actress Jennifer Esposito following her celiac diagnosis, has all of the spicy, warm, sweet fall flavors of traditional pie, with no refined sugar and tons of fiber, vitamin A, amino acids, and zinc. “It has saved me on more than one occasion when I was in serious need of something carb-y and sweet,” she writes in her new cookbook, Jennifer’s Way Kitchen: Easy Allergen-Free, Anti-Inflammatory Recipes for a Delicious Life. “Serve at a holiday dinner, bring it to a potluck, or just eat it because you want it. There’s simply no reason not to enjoy this pie frequently.”
The Breakfast, Lunch, Dinner, and Dessert Pumpkin Pie
Serves 4
Ingredients
- Grain-Free Pie Crust (recipe follows)
- 1 (15-ounce) can organic pumpkin purée
- ¼ cup full-fat canned coconut milk
- ¼ cup real maple syrup
- Splash of fresh orange juice
- 1 tablespoon plus 1 teaspoon arrowroot starch
- 1 teaspoon xanthan gum
- 2 teaspoons ground vanilla bean (or 4 teaspoons gluten-free vanilla extract)
- ¾ teaspoon ground cinnamon
- ½ teaspoon ground or freshly grated nutmeg
- ½ teaspoon ground ginger
- ¼ teaspoon ground cloves
- 1 teaspoon Himalayan salt
Method
- Preheat the oven to 350°F. Pre-bake the crust for about 10 minutes, until warm and firm. Let sit for a few minutes to cool. Keep the oven on.
- Combine all the remaining ingredients in a large bowl and mix with a spoon or hand mixer.
- Spoon the pumpkin mixture into the pie shell. Bake for about 30 minutes, until the pie is somewhat firm to the touch (it will get firmer as it cools). This is a grain-free crust, so it won’t brown. (But if you’d like to brown it slightly, rub some coconut oil or nondairy butter around the edges of the crust when there are 10 minutes to go, but watch carefully because you don’t want it to burn.) Let the pie sit for 25 minutes. I like to place it in the refrigerator to really firm up and cool—for that familiar pumpkin pie texture. Store leftovers covered in the refrigerator for up to 2 days.
Grain-Free Pie Crust

Makes 1 crust
Ingredients
- ¾ cup coconut oil
- ½ cup coconut flour
- ¼ cup cassava flour
- ¾ cup arrowroot starch
- 1 tablespoon maple sugar or date sugar (optional)
- ½ teaspoon ground cinnamon
- ¼ teaspoon Himalayan salt
- ½ teaspoon ground vanilla bean (or 1 teaspoon gluten-free vanilla extract)
- ⅓ cup cold water
Method
- Refrigerate the shortening, butter, or coconut oil for at least 20 minutes, until well-chilled.
- In a large bowl, combine the coconut flour, cassava flour, and arrowroot starch with a fork or whisk. (Really sift through it all to get out any lumps.) Add the sugar (if using), cinnamon, salt, and vanilla and mix again. Cut the cold shortening into dice-size cubes, add to the flour mixture along with the cold water, and mix until a dough forms. You can do this with a fork, or use a food processor to process quickly, until the mixture resembles large crumbs.
- Once everything is combined, gather up the dough into a ball and wrap with plastic wrap. Refrigerate for 15 minutes.
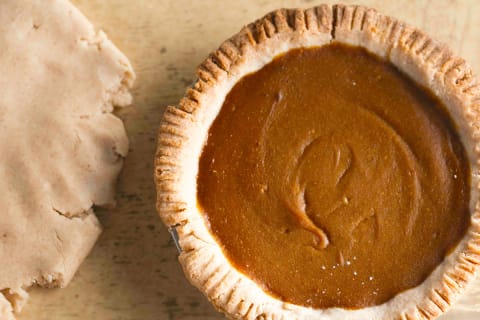
- If you are accustomed to pie-crust dough that you roll out, know that this is not like that. This dough is better for pressing into the pie pan. Get your hands wet and work the dough into a smooth shape. Put it in an 8- or 9-inch pie or tart pan and press down to cover the bottom and sides. Keep wetting your hands and working it. There are no mistakes here. Just get it in there as well as you can and it will taste great.
- To pre-bake this crust for precooked or raw fillings, bake for 12 minutes at 350°F. This crust won’t brown, but it will still be pre-baked.
Based on excerpts from Jennifer’s Way Kitchen: Easy Allergen-Free, Anti-Inflammatory Recipes for a Delicious Life by Jennifer Esposito & Eve Adamson, with the permission of Grand Central Life & Style. Copyright © 2017.